


 |
 |
 |
|---|
Desert Dawg - Building the
Shell
Part
II
|
August 7,
2005 I was able to complete the roof framing today. I had purchased a roof vent a couple of weeks ago and now I was able to decide where I want it located. Once again the Kreg pocket hole jig got a real workout. I just don't know how I would have done all of this framing without it. 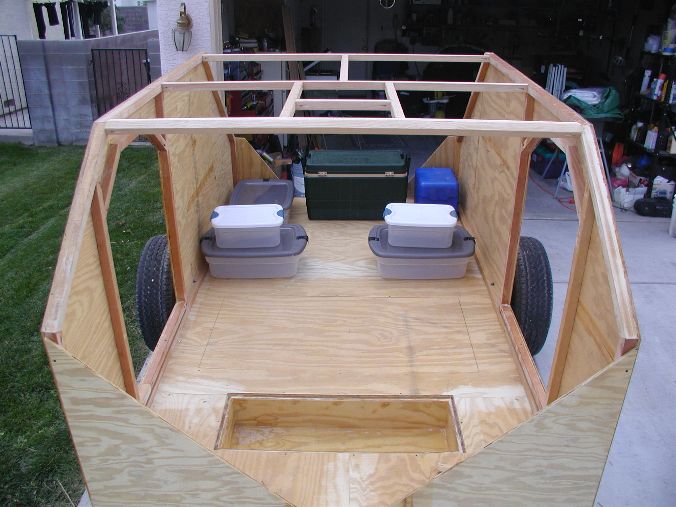 The plastic bins are going to be my 'drawers'. I'm not confident enough to try to build my own and these are lighter than anything that I could build. I'm setting them in their relative positions to see if the spacing comes out the way I would like. I want to have a TV and radio centered between them. August 20, 2005 It's another "trailer weekend". I seem to have difficulty making time for the trailer between all of the other activities that I have going on. I am determined to get some quality trailer time! Although the temperatures are starting to cool a bit from those hellish days in July, it's still hot working outside in the sun. Once again I've broken out the Easy-Up shade. I absolutely love having a portable canopy for camping, Dutch Oven cooking, and building the Dawg! 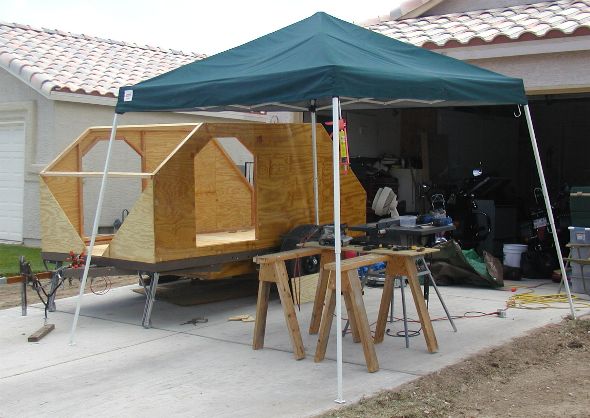 I've made progress on getting the exterior sheeting cut and put in place. I didn't realize how much stronger the cabin is one the sheeting is in place. I had started to worry a little about whether the trailer would fall apart on the first outing, but now I know that it will be plenty strong. 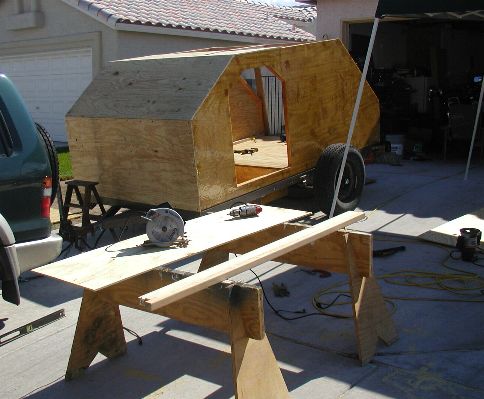 August 26, 2005 It's a three day weekend for me so I'm setting my sights on finishing the exterior sheeting and getting a coat of fiberglass on the roof. Once those tasks are done I can start gluing in wall nailers, run the rough electrical, and start gluing in the insulation. I won't get all of that done this weekend, but that's my short-term plan. I've finished the sheeting, then cut out the opening for the roof vent. It's really starting to look like a camping trailer. 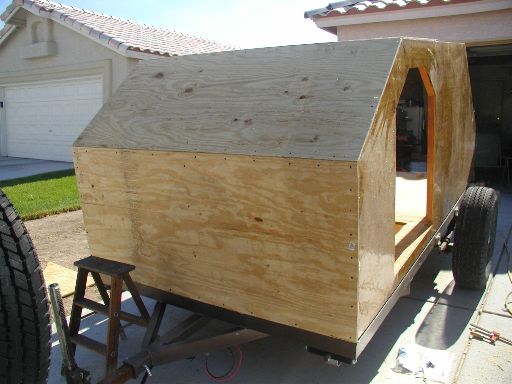 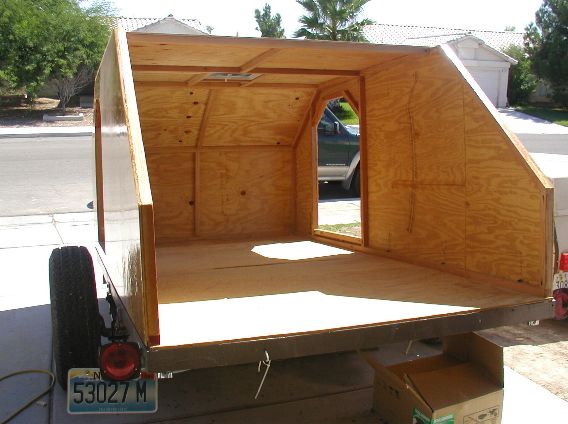 I cut all of the sheeting an inch wider than the actual measurement, then used a router with a flush cutting bit to trim it to the exact width. It worked really nice. I've done very little with a router and was very pleased with how well it worked. To cut the opening for the vent, I drilled a hold in the center of where the vent opening would be and again used the router to cut the opening. Because the router bit has a bearing on it, it guided the cut and I didn't have to worry about trying to cut on a line or anything like that. Sweet! 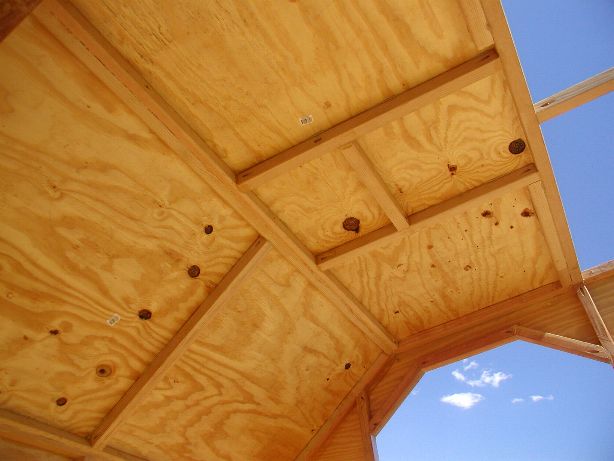 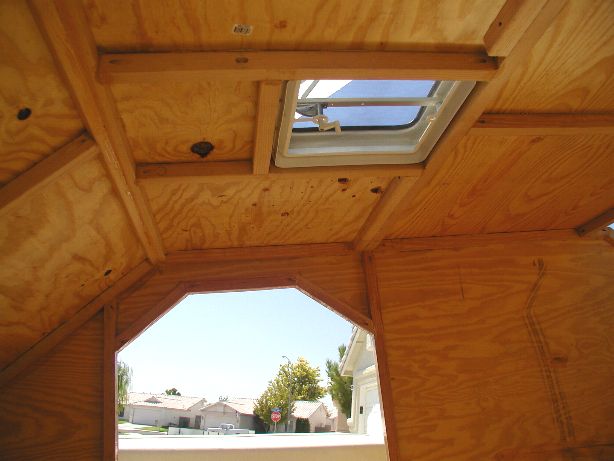 It's only noon on Friday so I should be able to get some more progress this weekend! Although I still have a lot of work on the shell, I'm starting to see the end in sight. August 28, 2005 As part of today's effort, I've started to install the wall nailers. I had originally planned to rabbit the wall spars to provide a structure to nail the walls to, but it was easier to add 1x2s after the studs were in place. 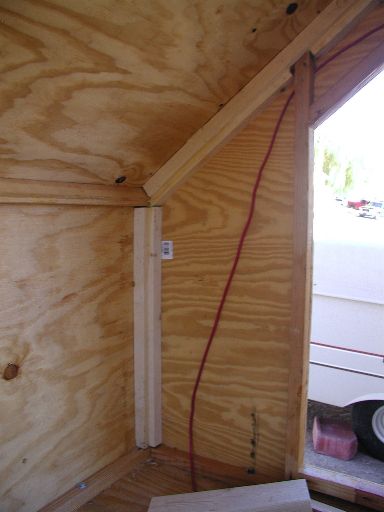 As you can see in the photo, I have some of the rough wiring in place. It won't be long before I start to install the insulation in the walls. I also bought a sheet of birch plywood to test some different finishes to see what I want in the trailer. Hopefully this week I'll play with the stains to see what I like best. September 5, 2005 I've taken a few days of vacation to work on the trailer. I hope to make some visible progress during this time. For some reason I've been putting off ordering the windows. I love the look of the old style louver windows but they aren't easy to find. I've been looking for some for quite a while and had pretty well given up looking. I still wanted to get a window to go across the front of the trailer and figured that the front window of a cab-over camper would work just right, so off to the junk yard I went. I made a couple of good finds. I was able to find three louver windows and the back window from a motorhome. The louver window are a bit bigger than I really wanted but they will provide a lot of ventilation. I'll keep the third one for parts. The rear motorhome widow is also an emergency exit window so it can be opened as well. 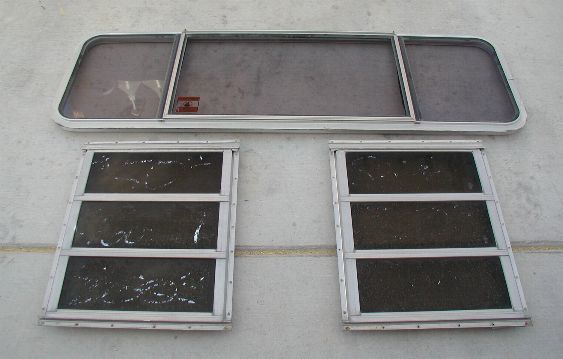 After getting home I was able to apply the first coat of resin to the top of the trailer. I'm following the suggestion of a number of experienced folks and coating the plywood with resin before doing the actual glassing. Applying the glass without a sealer coat can cause problems because the ply is so dry that it sucks up all the resin and the glass doesn't adhere well. It's supposed to be windy for the next few days so I don't know if I can get the glass on this week or not. I'm hoping to get the front window opening cut out and framed out this weekend as well. I'm starting to think about finishing and painting the exterior so I can start installing the windows, roof vent, and ventilation fan. Depending on how motivated I feel, I may even start working on the doors. September 9, 2005 I decided to go ahead and cut the opening for the front window. It will save me a little on epoxy and I was excited to see how the window was going to look. After I put it in place I was pleased by how it turned out. 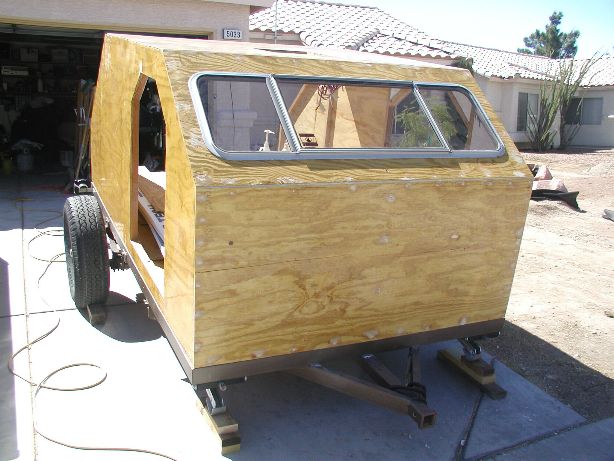 Once again, I need to move a bit further back when I take the picture so the wide angle lens doesn't distort the relative size. The window looks better proportioned when looking at it in person. September 25-26, 2005 With the temperature starting to cool off, I forgot to put on sunscreen this weekend. Wow that hurt! I had just started glassing the front of the shell when I started to really feel the burn. With wet glass being installed I just couldn't walk away and put on sunscreen. I was pretty well cooked by the time I was done! There is only one small spot on the front of the trailer that still needs to be glassed. I'm going to knock that out this coming weekend. Take a look at this next picture. You can just see the edge of the fiberglass extending past the front edge of the trailer. While it's not especially difficult to do this kind of fiberglassing, I'm not really certain I care much for it. I always start to stress a bit once I have a batch mixed up. I worry that I won't get the fabric on right or that it will start to gel before I'm ready. That said, it's really great stuff. I'm convinced that it will do the job of protecting the trailer for the remainder of my life (and maybe a few folks that aren't even born yet!). 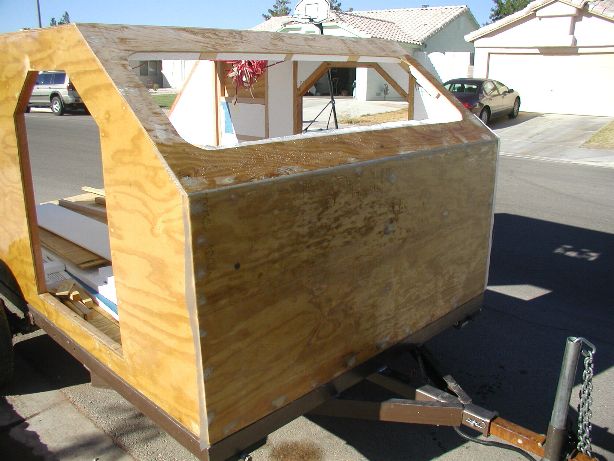 I'm starting to think that the "Building The Shell" part of this website is just about finished. I need to add an additional coat or two of resin before paining the exterior, but that's it! I will probably start working on the interior this weekend. The shell really seemed to drag out, but the end is in sight! I'm excited to see that there is real progress. My next addition to my website will probably be on the "Cabin" page. See 'ya there! October 15, 2005 Ok! Ok! I know that I said my next addition would be on the cabin page, but there was still a bit of work to be done on the outside. Actually, there still is but I'm starting to wind down. I finished glassing the shell (less the doors and back hatch of course). I also starting sanding the entire exterior in preparation for the next coats of resin. It's time consuming and boring work, but important if the exterior is going to look nice. 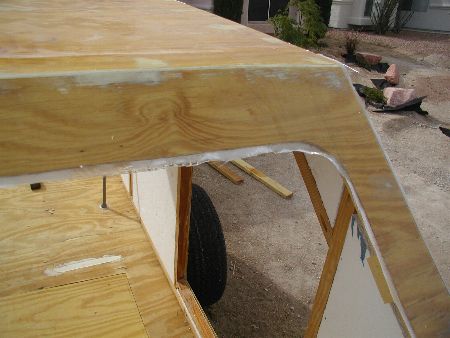 Having the exterior glassed make me less worried about rain causing damage to the shell. As a side note, a couple of days after I glassed this last portion of the trailer we set a new record for receiving the most rain in a single day in October. We've been suffering a severe drought for the last 8 or 10 years. We have gotten quite a bit of rain this year so we are all hoping that this signals the end of the drought. November 20-21, 2005 I've always liked jalousie windows and was fortunate to salvage three window assemblies from an old camper. Unfortunately they are three pane windows and are too large for my doors. I really need two pane windows if I want them to look right. After closely examining the windows I've decided that I can cut them down and remove the extra pane. I have three windows so if I mess one up I'm still OK. Here goes! 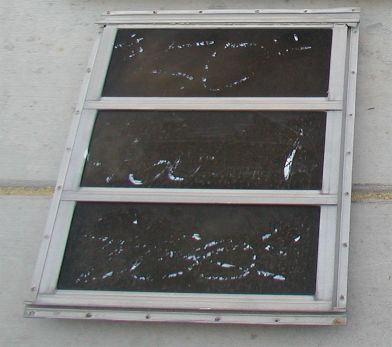 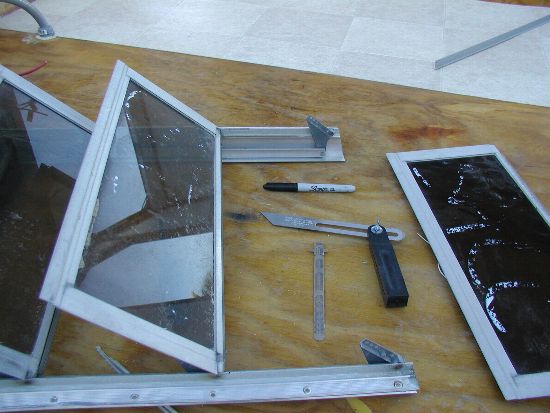 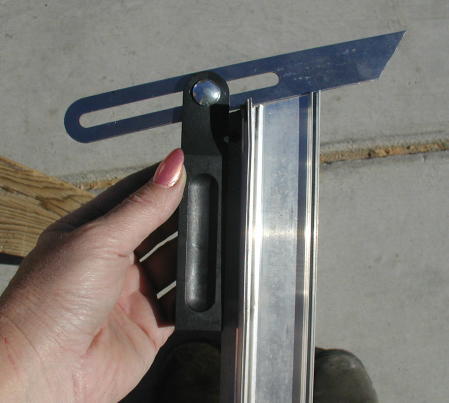 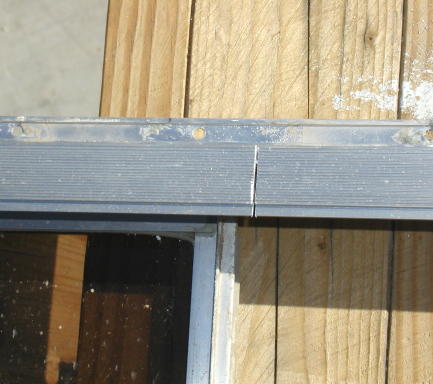 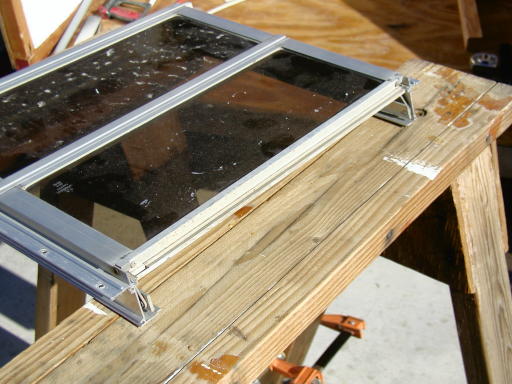 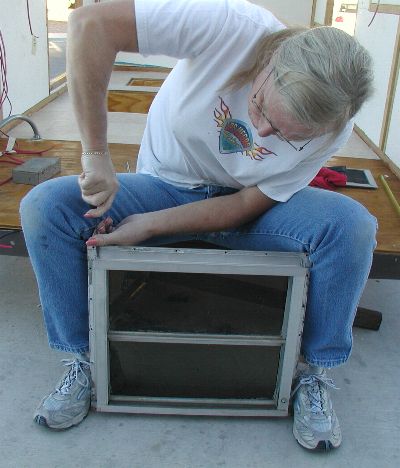 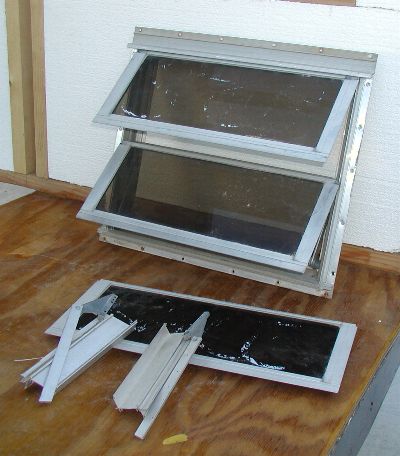 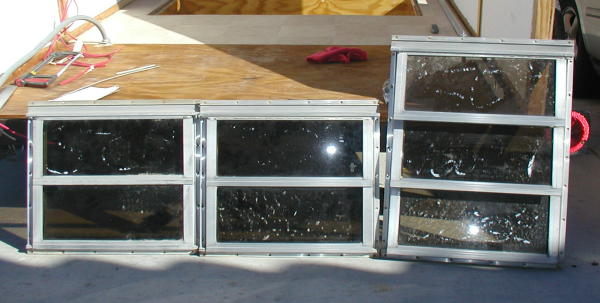 December 03-05, 2005 It's getting close to the first anniversary of the Desert Dawg project. When I started I never thought it would take more than a year to build. I hope to be camping in the Dawg by springtime. Maybe it won't be *done* but it will be usable. This weekend's effort is to frame out the doors. The windows that I have will fit a 1 1/2 inch thick wall. That means that I have to make my doors thinner than the trailer walls. The outer skin is 1/2 ply so I have to cut down the framing to 1 inch. After milling the framing down to 1 inch thick I had to use a hand plane to remove the saw marks. Once again I have gained respect for those old time woodworkers who only used hand tools. In order for there to be enough clearance for the doors to open without binding, my first step was to trim 3/16 off each side of the doors. I had to pay attention to make certain that each of the angles were cut properly. The top corners are 18 1/2 degrees and the lower corder are 26 1/2 degrees. 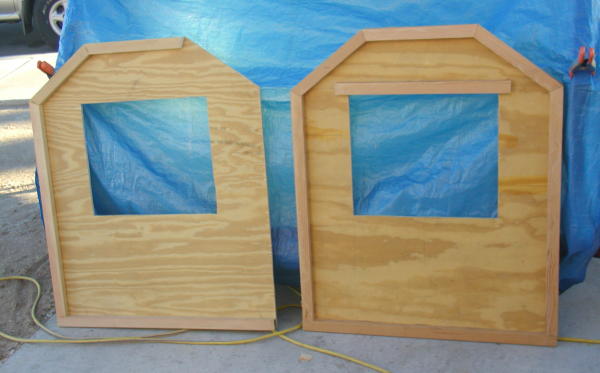 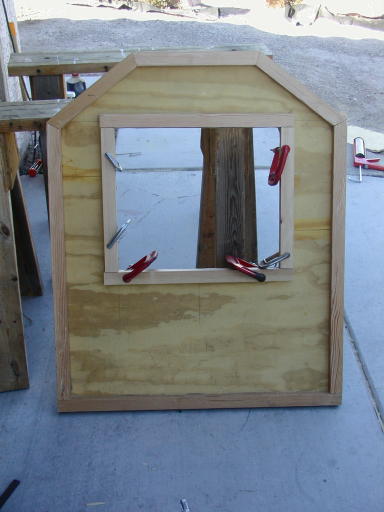 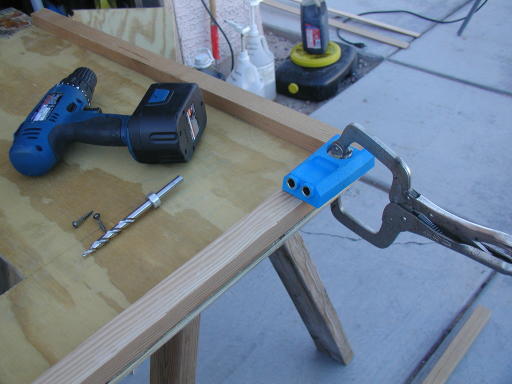 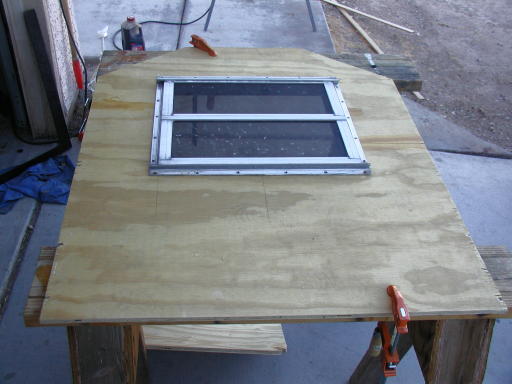 There is still a lot do to on the doors. The door latches are should be here later this week. That will allow me to add whatever framing is necessary to mount them. The next step is to apply fiberglass and resin to the doors. It's not a lot of work but, it's going to be a slow process with the weather being so cool. 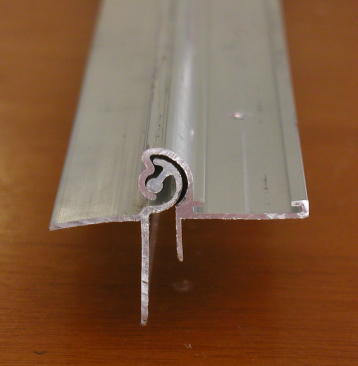 I ordered my hurricane hinge, door handles, door latches, and seals from Grant at Lil' Bear Tag Alongs. December 10-12, 2005 It's the 1 year anniversary of the Desert Dawg Project!! I had hoped to be done with the trailer by now, but I'm still happy with how it's coming together. I like the overall proportions of the trailer and think it's going to look pretty good when I'm done. 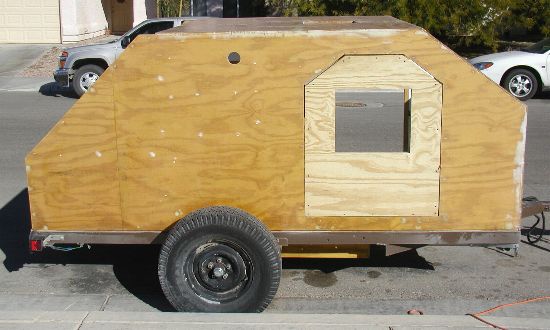 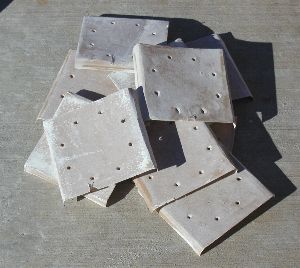 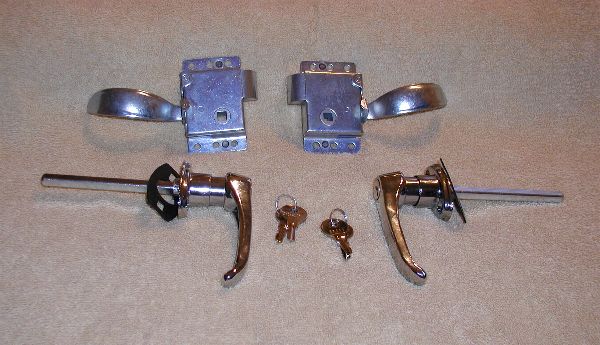 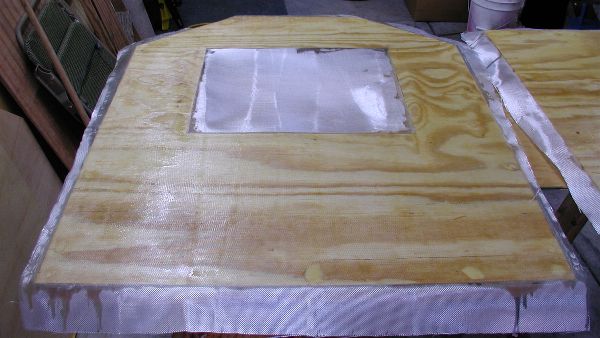 December 17-18, 2005 Even with the Christmas shopping and the cold weather, I was able to make a little progress on the 'Dawg this weekend. The weather was cold enough that I had to heat up the epoxy before recoating the doors. It worked out just great. I spent a bit of time sanding the doors so they are ready for paint. Did I say paint?!? It's hard to believe that I'm starting to seriously think about paint. I live in a hot climate so I want to keep the color light, but want to stay away from pure white. In keeping with the desert theme, I'm planning on painting a light sand color. The least fun part of this weekend's work was the hours I spent sanding the exterior of the shell. I went through another stack of sandpaper. Sorry that there aren't any great action photos of me sanding, but I'm sure you can use your imagination! January 7-8, 2006 It's time to start the new year off with a bang! It's time for paint! The majority of teardrops are made with an aluminium skin. Since I'm using epoxy on the exterior, painting is mandatory for two reasons. The first reason is that epoxy is not UV stabilized. Over time it will deteriorate if not protected from the direct sunlight (that's bad!). The second reason is that the plywood sides are downright ugly! So paint it is. I spent some time looking into various types of paint. Some folks paint with exterior grade house paint, but I don't think that will provide the look that I want. Automotive paint would work, but it would need to be sprayed on and I'm not convinced that it would be durable enough. Boat paint seemed to be the obvious choice. I chose a one-part polyurethane enamel made by Interlux. It's made to be applied over fiberglass, it's UV stable, very durable, and (very important to me) it looks good even when applied with a roller. 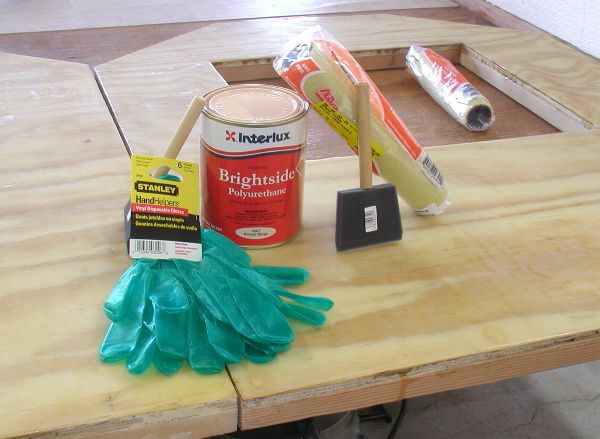 One thing I found out while researching the boat paint is that everything matters. The paint matters, the tools matter, preparation of the surface matters, it all matters. Even your gloves matter. Don't use those green gloves in the picture when using the wax removal solvent. It will eat right through them and take off your fingernail polish. Ask me how I know this. You are wearing polish aren't you? My nail lady doesn't mind the extra business but I wasn't real happy about it. Sorry about that, back to the project. Before we got too much further along, I'd suggest if you decide to use this type of paint that you go to the Interlux website and read all of the information they provide. They explain how to prepare the surface, which solvents to use, the correct primer, and the actual instructions for painting. I'll walk through some of the items that you should be aware of. The company SeaFit makes a special roller cover that works really well with this paint. It has a foam nap of about 1/8 inch thick which is perfect for this paint. It is also solvent resistent so it won't be ruined if you need to clean it. (I just bought a couple of them and threw the used one away after each coat.) The roller cover is 9 inches wide but I wanted to use a smaller 7 inch roller handle for more control, so I carefully used a hacksaw to shorten the cover. Then I trimmed the foam on the cut end with a pair of scissors so it was rounded like the original. On the inside spool of the roller handle is a lip to keep the roller cover from sliding on too far. Because this roller cover is soooo thin, that lip had a habit of touching the wall as I pressed on the roller. This left ugly lines in the primer that I had to smooth out. Before applying the color coats I used a file to remove most of the lip. I never had another line in the paint, although I would occasionally have to reposition the roller cover. 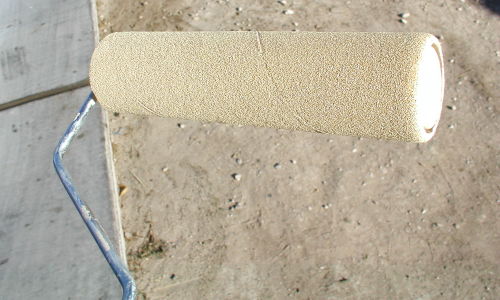 How much difference could a pan liner make, right? It did! Pan liners, like the pans themselves, have little bumps to help remove excess paint from the roller. The problem I found is that the little bumps removed too much paint from that thin roller. When I rolled it on the wall it looked like I was painting leopard spots. To resolve this I cut a scrap piece of my interior panelling and used it to even out the paint on the roller. It worked perfectly! The foam brushes are used for the "paint and tip" technique. More on that later. 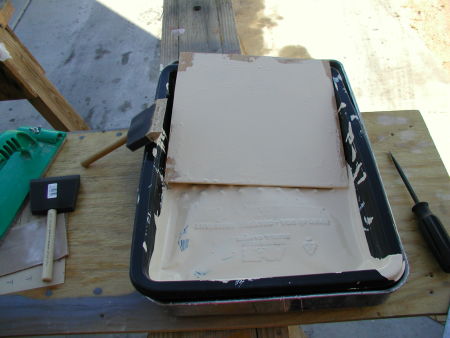 The Interlux instructions are very thorough. The basic steps for raw fiberglass is to wipe down with a special solvent, then sand, then wipe with a second solvent, then prime, let dry, sand, wipe with solvent, paint, dry again. Finally, sand, wipe with solvent, and paint again. Whew! That's a lot of steps. It took me three days to complete the job. It would have taken less time but there is a sixteen hour drying time between coats. 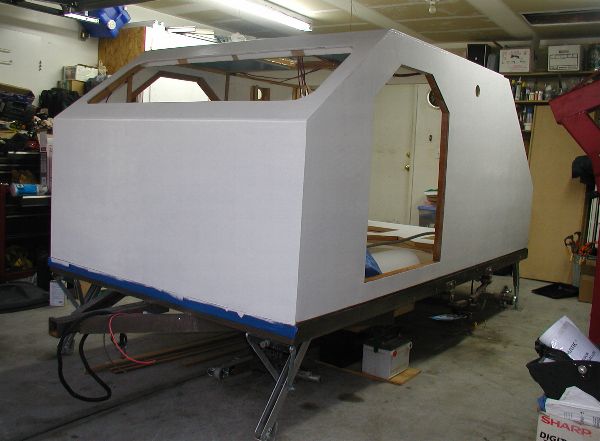 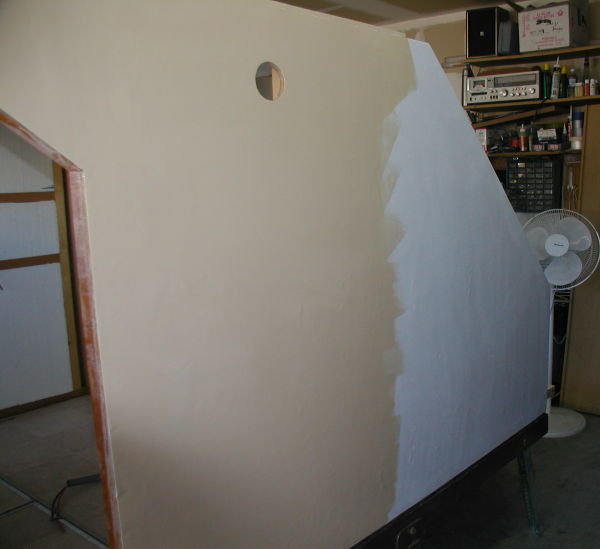 If you look closely at the photo below you will notice little bumps on the left side of the painted wall. The right side of the wall is nice and smooth. This is where the "paint and tip" technique comes in. The paint is quite thin so the roller leaves bubbles all over the freshly painted surface. To get rid of the bubbles, very gently pull the foam brush over the surface where the bubbles are. The bubbles are popped and paint flows out nice and smooth. It's really quite amazing. 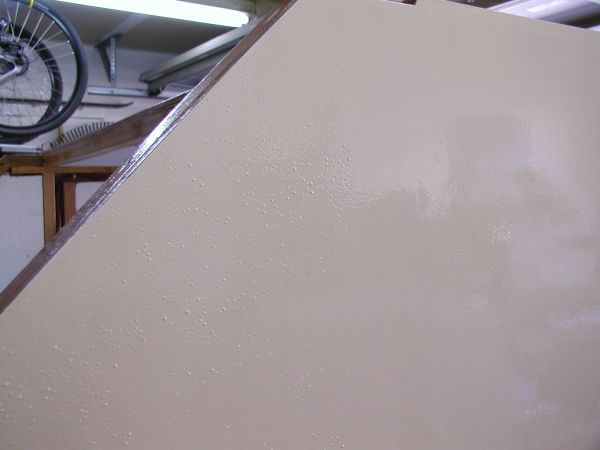 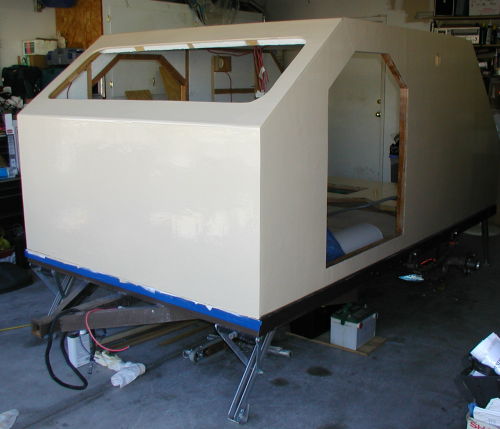 I'm not experienced with fiberglass so there are a few bumpy places on the trailer that no type of paint is going to conceal. All in all I'm really pleased with how the trailer looks with the paint on. It looks as good as I had hoped for. February 11-12, 2006 I'm going to describe more about installing the front window in the cabin page, but I couldn't go without posting a picture here to show just how much different the trailer looks with the window in place. I like it! 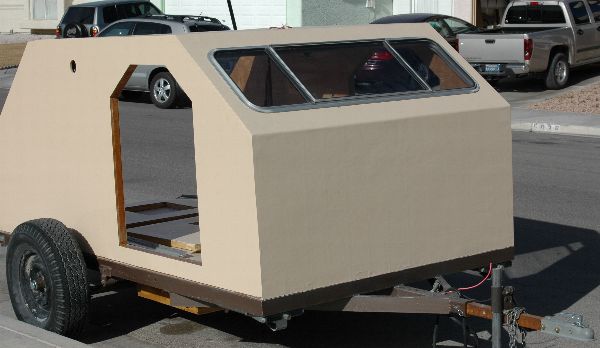 February 18-20, 2006 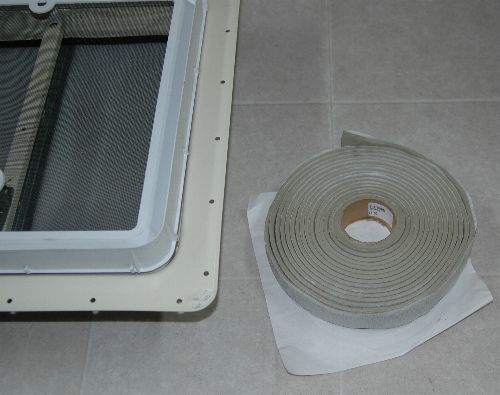 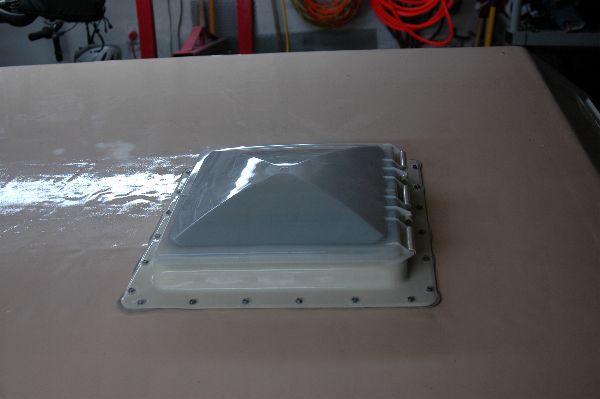 I need a way to finish the door sills so they will look nice. I've thought about strips of aluminum or some type of laminate. There was a thread on the teardrop forum about using Bondo to fill nail holes or low areas prior to painting, so I thought that I would see if I could use it to smooth out the door sills. Then I can paint them to match the exterior and trim them with aluminum angle. 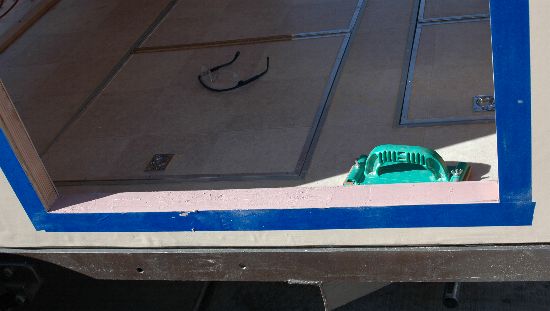 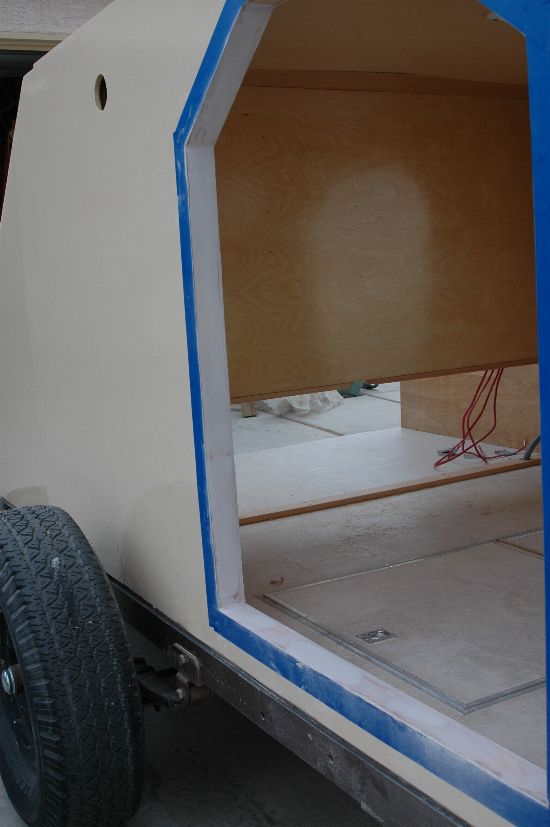 If the Bondo works out OK, I'll do both door sills, the door edges, and the hatch sill. Lots of work! February 25-26, 2006 I'm going to start working on my doors. Initially I need to insulate them and get the inner skin on them. It's not difficult work but it does take a bit of time to complete. 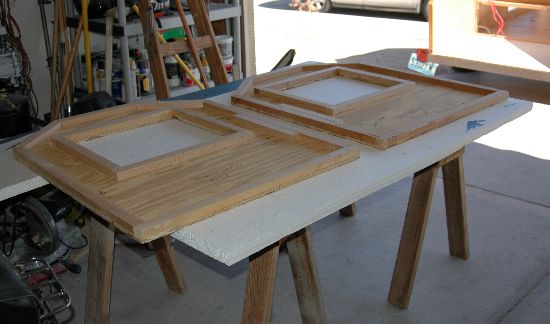 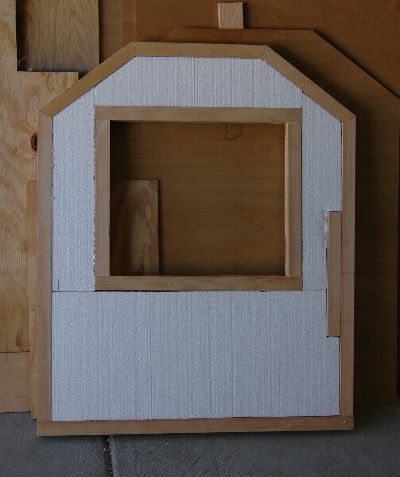 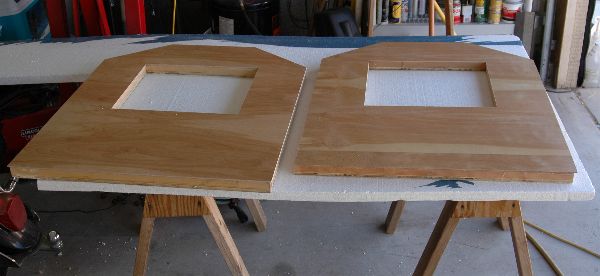 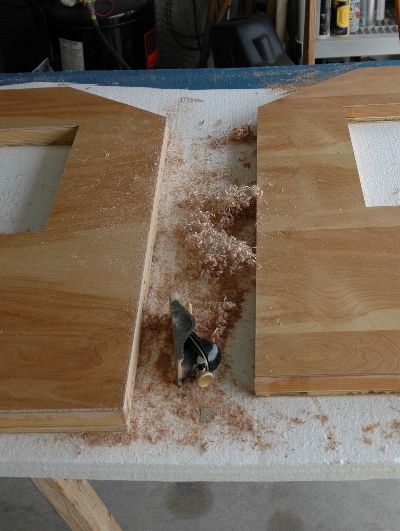 |