
|
|
Dutch Oven 101 - Basic Technique
|
A little technique
goes a long way. Dutch Oven cooking is really quite simple, but there are a few things you should know that will make your initial cooking experience much more successful and enjoyable. This page will tell you how to prepare your new oven for cooking, how to get the heat you want without burning, and how to clean your oven after you are done cooking. It's in the box! So you have a brand new Dutch Oven still in the box...is it time to light the coals? Well, not exactly. New ovens need just a little bit of preparation before they are used. Note: If you have purchased a Lodge Logic oven that is pre-seasoned, you don't need to perform the following steps! The first step is to thoroughly clean you oven. Some ovens have a light coating of wax to prevent rust, so that needs to be removed. You should scrub your new DO with hot water then put it upside down in your home oven (along with the lid) and let it heat to 350 for an hour or so. This will get any wax off the oven and get it ready to season. Seasoning cast iron will give it a beautiful black finish and make it "low stick". It's not quite Teflon, but a well seasoned skillet or oven is easy to clean. Like the rest of Dutch Oven cooking, seasoning isn't a "black art" but using a proven technique will make you successful on the first try. 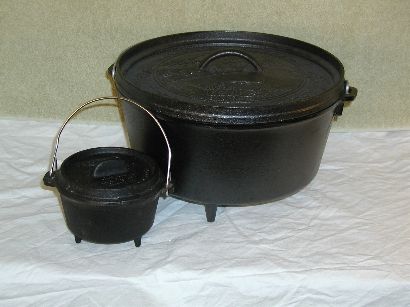 Shhhh! If you promise not to tell anyone else, I'll share the three step method I use to seasoning my ovens. The first step is to warm the lid and oven. You can use your kitchen oven, a surface burner, or even your BBQ. You want the oven warm but not too hot to pick up with your bare hands. The second step is to get out the Crisco and a small cotton rag. You are going to lightly coat your oven with Crisco. Since your oven is nice and warm, the Crisco will liquefy as you rub it on with the rag. I use a small spoon to dip the Crisco out of the can and put it on the rag. Then I wipe it onto the oven. Cover every surface of the oven and the lid. If you get any small puddles, you are applying it too thickly. Wipe off any excess. The final step is to bake your oven. Sounds kind of silly, eh? Baking the oven!?! This step causes the shortening to form the hard, black coating on the oven. You can use your kitchen oven, or do as I do and use the outside BBQ. Heat your oven or BBQ up to 400º - 450º and place your Dutch Oven inside. I place aluminum foil under mine so it collects any shortening that might drip off. Let the Dutch Oven cook for about an hour, then turn off the stove or BBQ and let everything cool down. You've done it! You've seasoned your first piece of cast iron! Chances are it won't be your last. Light my fire! For you pyros out there, now is the fun part. You can start playing with matches. A charcoal chimney makes starting your charcoal and moving it where you want it real easy. 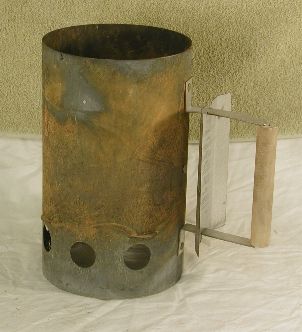 At this point it's important to say a little something about charcoal. My experience confirms what the old time cooks have said, "Use quality charcoal". It lights easily and burns consistently. Can you guess the brand that I use? 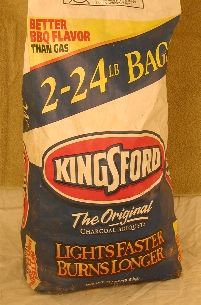 So now that you have your starter chimney and you bag of charcoal, the next logical question is, "How much charcoal do I need to start?" There's a real simple answer, "It depends". Great answer, huh? The good news is that there is a rule of thumb for how many briquettes you will need for your oven. The general rule is, for 350º you use twice as many briquettes as your oven is in diameter. As an example, for a 12 inch oven you would want to start 24 briquettes. Pretty simple really. The next general rule is that each additional briquette that you add will increase the oven temperature by 10º to 15º. While we are on the topic of starting charcoal, here is a word of advice. Start more charcoal than you need! If you have too many coals it's no problem, but if you find that your food needs a bit more heat you will be really glad you have some extra coals ready to add to your oven! When you're hot, you're HOT! You are ready to start cooking your masterpiece but where to put the coals? Does it really matter? More than any other factors, proper positioning of coals and control of heat will determine the outcome of your meal. Place too much charcoal on the bottom and it will burn. Not enough heat and the food never gets done. Don't worry though, here are the secrets to getting your heat just right. Just like in real estate, location is everything! In the picture below you can see the proper positioning of the lower coals. 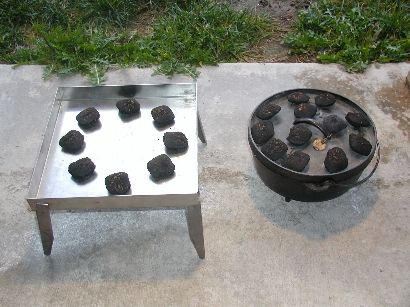 Since heat rises, the placement of the lower coals is more important than the placement of the upper coals. You want to create a ring of coals that is about the same diameter as the oven. Notice that there is no briquette in the center! This pattern will generate plenty of heat. If you are baking bread or biscuits it's especially important not to have a center coal! For the top coals, you position them around the outside rim with some in the middle. Very few dishes are sensitive to top heat so specific coal placement is not as important as it is on the bottom. Shown below is the proper coal placement for most recipes. 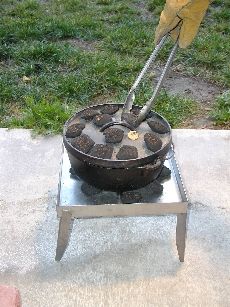 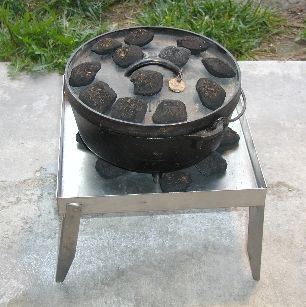 When you get ready to divide the coals between the top and bottom you will want to take into consideration the type of food you are cooking. For general cooking you want to put half the coals on the bottom, then the rest on the top. Then, because heat rises, you want to take 2 or 3 from the bottom and put them on top. This should be good for most foods you prepare. If you decide to bake bread, use 1/3 on bottom and 2/3 on top. If you need to brown some meat before adding the rest of the ingredients, put all the coals on the bottom. Once the meat is browned, move coals from bottom to top. A couple of "pro" tips. Here are a couple of tips that will make you look (and cook) like a pro. Spin, spin, spin to avoid hot spots. Not you silly, the oven. Every few minutes lift your whole pot up, spin it a quarter turn, then set it back down. Lift the lid up and spin it a quarter turn in the opposite direction. If you have a hot spot of coals, this will keep it from being in the same spot for the entire cooking time. If you have a recipe that cooks for an hour, turn every 15 minutes or so. The weather will effect your cooking time. Cold or cloudy days require more heat (more coals). Windy days can make your charcoal burn faster, but it will also blow the heat away. Use a wind shield if you can. In the pictures below is an example of a wind shield. The tube is actually "metal flashing" that I bought at Home Depot. 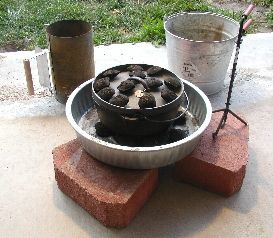 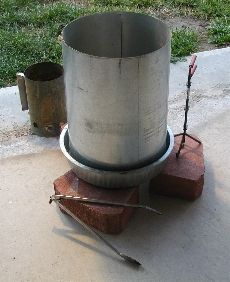 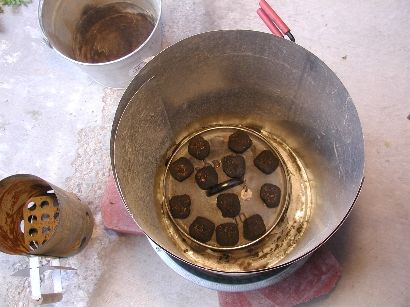 It's quite common for beginning DO chefs to be overly concerned about specific coal counts, coal positioning, and cooking time. While these are important, you also need to use your cooking instincts. For example, use your nose when you cook. If you start to smell the food you are cooking, it's probably done (or close to done). If something needs to cook for an hour, don't be opening the oven every 10 minutes to see if it's cooking. You let the heat out and lengthen the time it takes to cook. A clean oven is a happy oven. One of the joys of cooking with a well seasoned Dutch Oven is the fact that they clean up easily. That black coating is the key! In order to protect the seasoning you don't want to wash your oven with dish soap. The best way to clean a DO is with hot water and a nylon scrub brush. Once the oven is clean and wiped dry set it back on the coals (or on the stove) for a couple of minutes to heat it up and make certain that it's completely dry. You don't want rust forming on your prized oven. As a last step, wipe a light coat of oil on the oven. I generally use a light coat of Pam spray, then wipe off the excess with a rag. Now the oven is ready for the next meal. So now you're a "Know It All"! Dutch Oven cooking is really pretty simple. Having skills with a Dutch Oven opens a wide range of cooking opportunities to you. Follow these basic tips and it won't be long before you are whipping out delicious, not to mention impressive, meals right at your camp site. Like everything else in life, a bit of practice will make you a better DO cook. My last tip is to practice at home a few times before you head out camping. It gives you the opportunity to make a couple of mistakes without someone having to go hungry. Keep those coals hot! |